User Guide
Installation
- Step 1: Install QinEngineV3
You need to download QinEngineV3_Installer on either Windows (English/繁體中文) or macOS (English/繁體中文). After going through the installing process (default installation recommended), you will find standalone application, VST3, AAX and AU (macOS only) plugins on your system. Note on macOS, you may need to allow third-party app to be installed in “System Settings => “Privacy & Security”.
- Step 2: Install Your Soundbank
You need to download all your soundbank installers on either Windows or macOS. Check out product page for soundbank links.
Note that on Windows, you can install soundbank anywhere on your computer or external drive in the installation process.
On macOS, you will have to install to default directory (~/Documents/Kong Audio Soundbank). Then feel free to move the soundbank files anywhere on your computer or external drive with setting the right sound bank directory in QinEngineV3.
- Step 3: Scan QinEngineV3 Plugin in Your DAW
FYI, these are the default plugin installation directories:
| Windows VST3 | C:\Program Files\Common Files\VST3\Kong Audio |
| Windows AAX | C:\Program Files\Common Files\Avid\Audio\Plug-Ins |
| Mac VST3 | Macintosh HD/Library/Audio/Plug-Ins/VST3 |
| Mac AAX | Macintosh HD/Library/Application Support/Avid/Audio/Plug-Ins |
| Mac AU | Macintosh HD/Library/Audio/Plug-Ins/Components |
Please scan your customized plugin directory if you installed them somewhere else.
Activation
- Step 1: Fill In Your Account Info
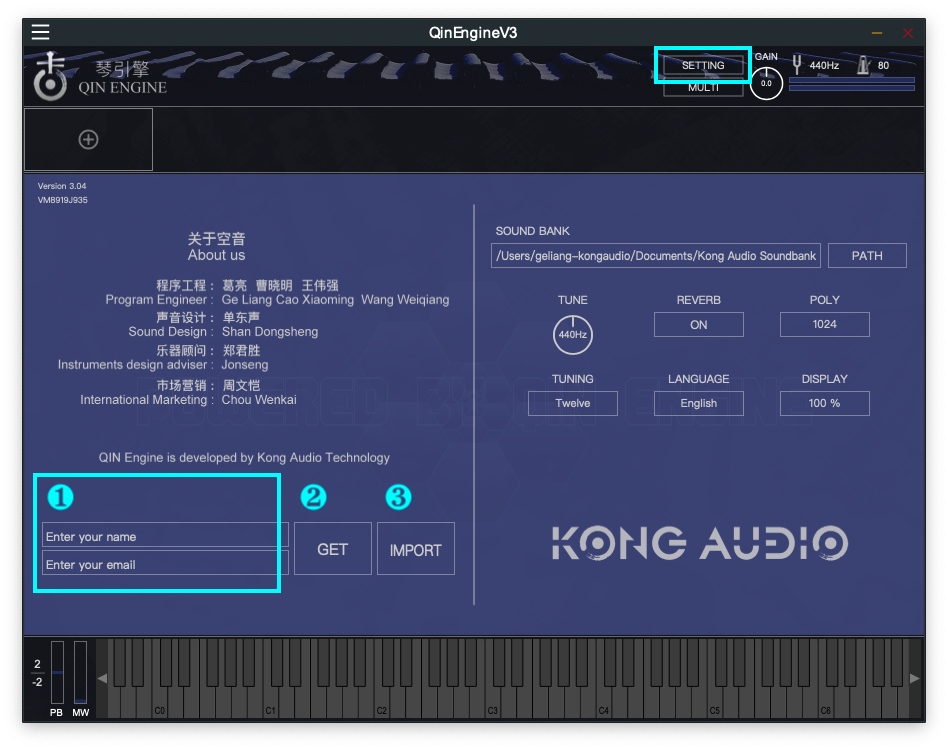
Open QinEngineV3 application or plugin in your DAW, navigate to “SETTING” page.
Fill in your username and email.
Important: If you purchased our product with PayPal, your username and email should be the same as in PayPal. If you changed your username or email with our customer service members, please remember those since they are the key to get license file. If you forget your account info, please contact us via info@chineekong.com.
- Step 2: Get Your License
Click “GET” button. QinEngineV3 should give you a notification regarding your account status.
You are expected to find an email with your license file in txt format.
- Step 3: Import Your License
Download your license file to your local system.
Click “IMPORT” button, locate your license file, and import it.
- Step 4: Get Success Notification

You should be able to see a success notification as above.
Now restart QinEngineV3 program or plugin.
- Step 5: Account Hidden For Privacy
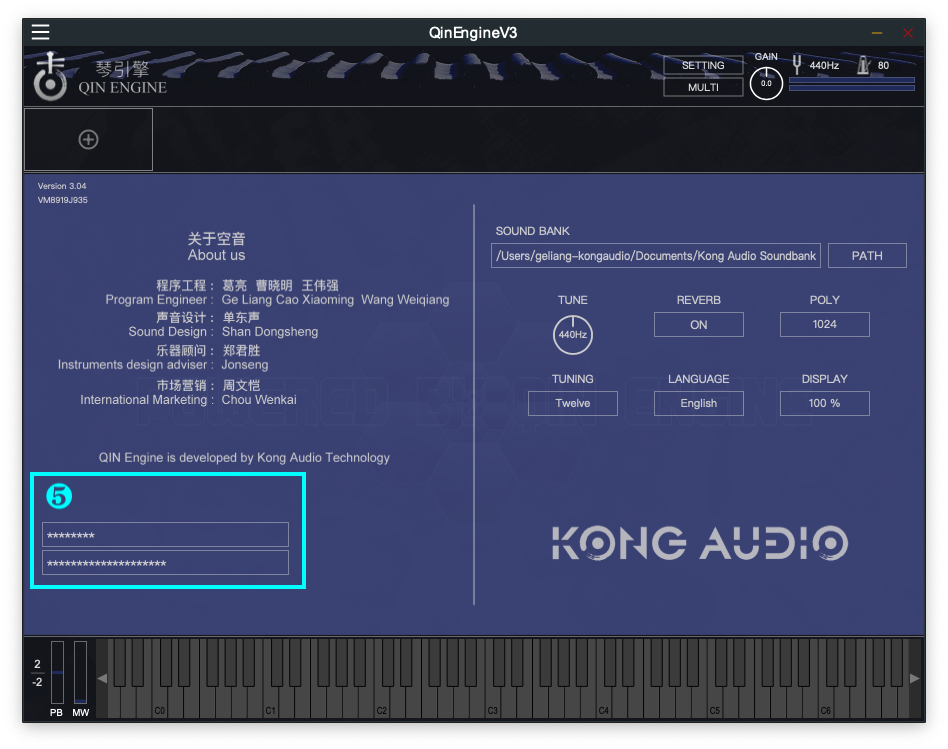
Once your program or plugin runs correctly, the account information detail is hidden for privacy.
Usage
- Step 1: Make Sure Your Sound Bank Location Is Correct
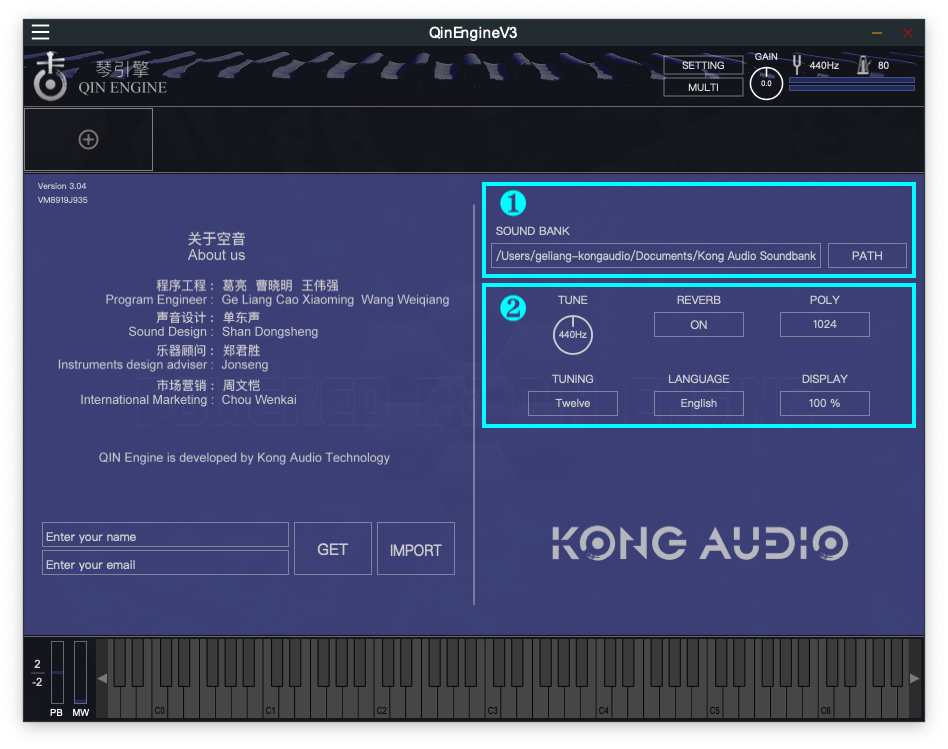
If you moved soundbank files else, please click “PATH” and redirect it.
- Step 2: Set Global Parameters
You can change global tune frequency, maximum polyphonic voices, tuning type, display ratio, etc.
- Step 3: Find The Add Button
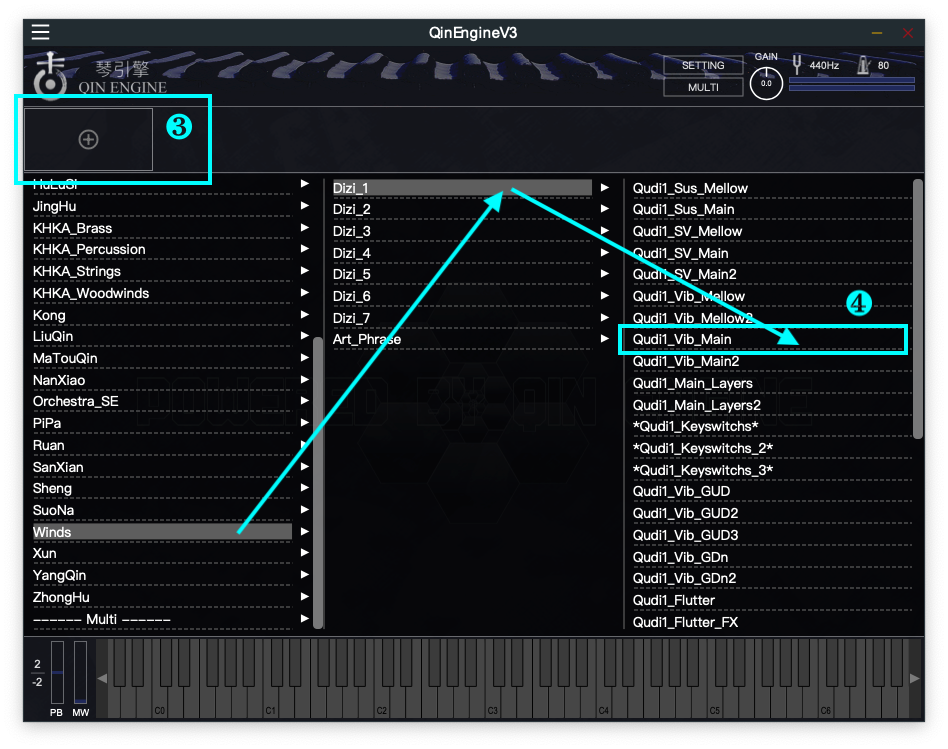
It is the only entry point to add a instrument preset to QinEngineV3 list.
- Step 4: Add A Preset
Once you clicked the “Add Button”, the instrument library should show up. Simply navigate to your desired preset through folding menus.
- Step 5: Set Your Channels
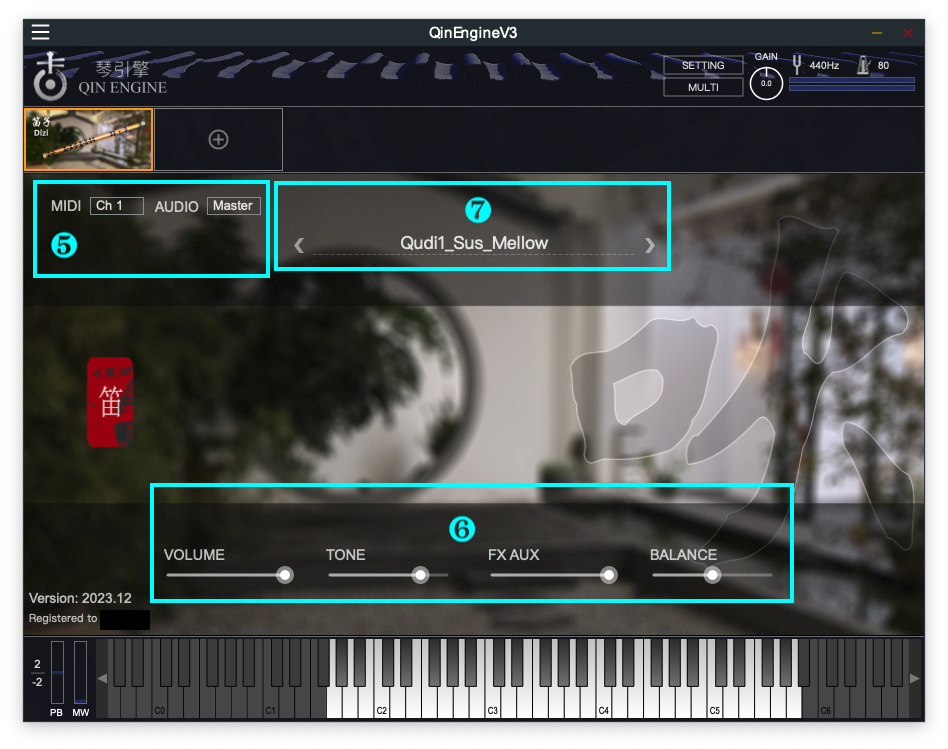
You can configure your midi input channel and audio output channel here.
- Step 6: Preset Parameters
QinEngineV3 gives you freedom to change Volume, Tone, FX AUX and Balance for your sound design.
- Step 7: Quick Preset Change
If you are not satisfied with this preset, QinEngineV3 provides you with quick preset change by left/right arrow buttons. Or click on the preset name, the instrument library will show up.
- Step 8: Change or Delete Preset
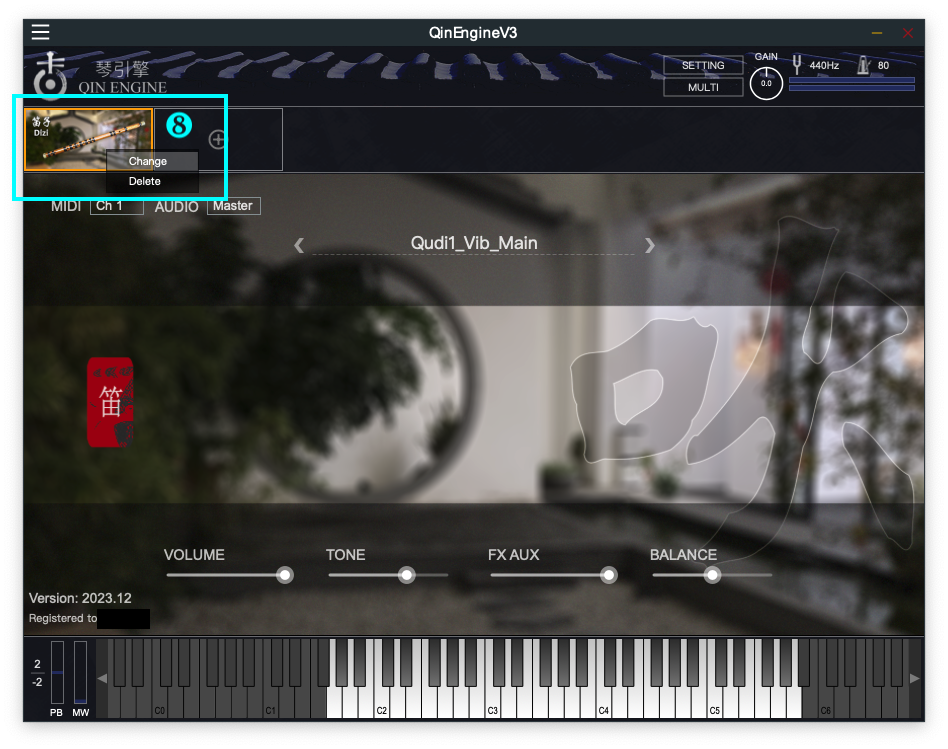
Simply Right Click on a preset, a popup menu will show up for you to change or delete.